使用python+blender绘制原子结构示意图--以黑磷为例
摘要
使用python+blender绘制原子结构示意图 --以黑磷为例
也可以代入其他原子结构
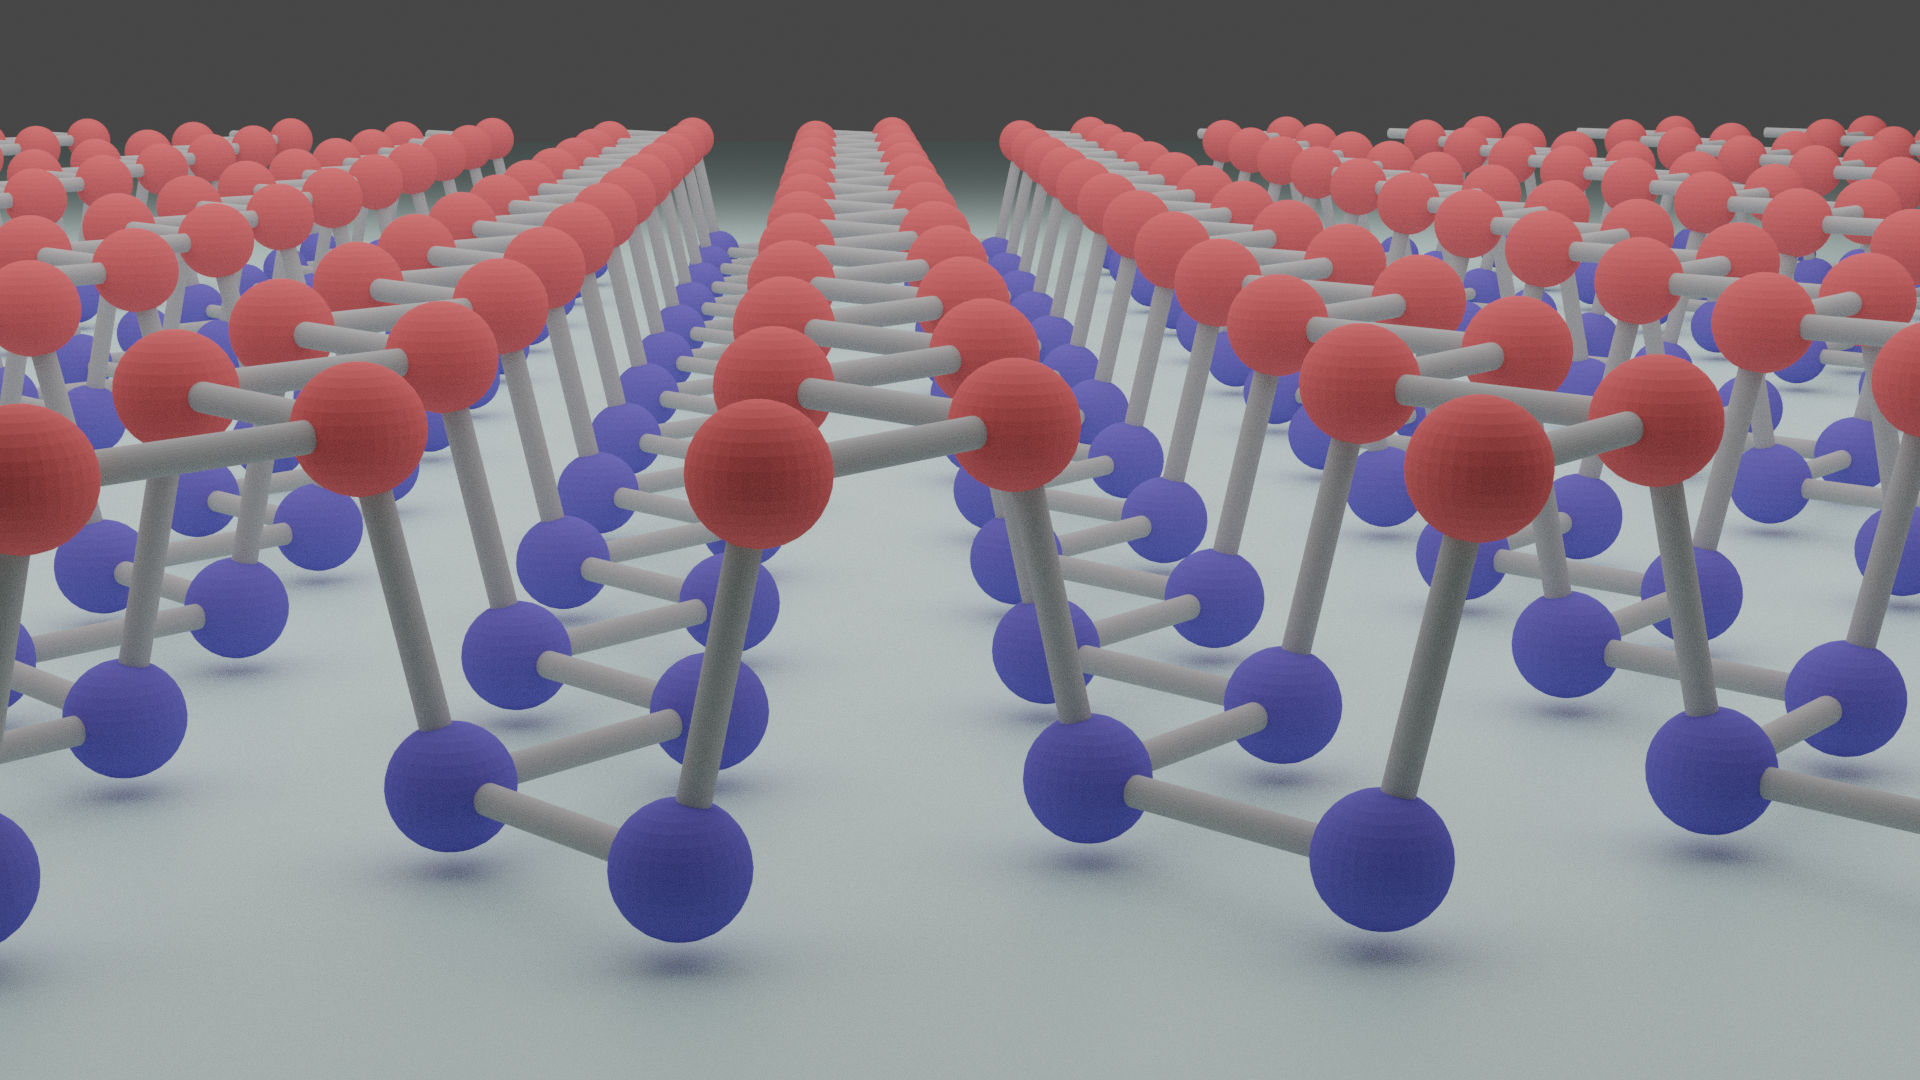
1.结果样式
2.blender和bpy
Blender是一款免费开源三维图形图像软件,支持python脚本创作。其中bpy库就是用来对其进行操作的。
3.绘图步骤
3.1 准备工作
3.1.1 安装blender
3.1.2 计算参数
将需要绘制的atoms和bonds写成json文件
atom有4个元素:原子种类,颜色,半径,位置 bond有一个列表元素,列表中包含了bond的起始坐标和结束坐标。
其中前面的名字可以随意写。
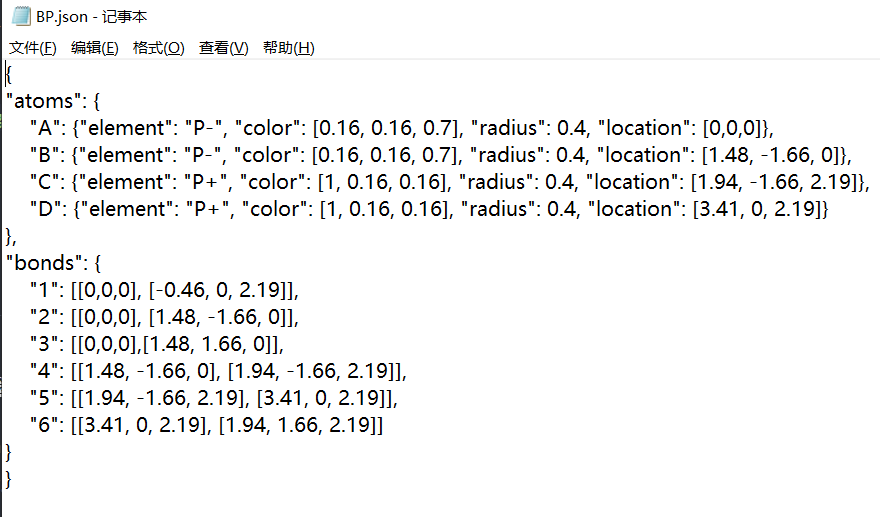
注:这里的数据不是黑磷的真实数据。
3.2 绘制图像
3.2.1 执行脚本
打开blender选择常规,可以看见下图画面。
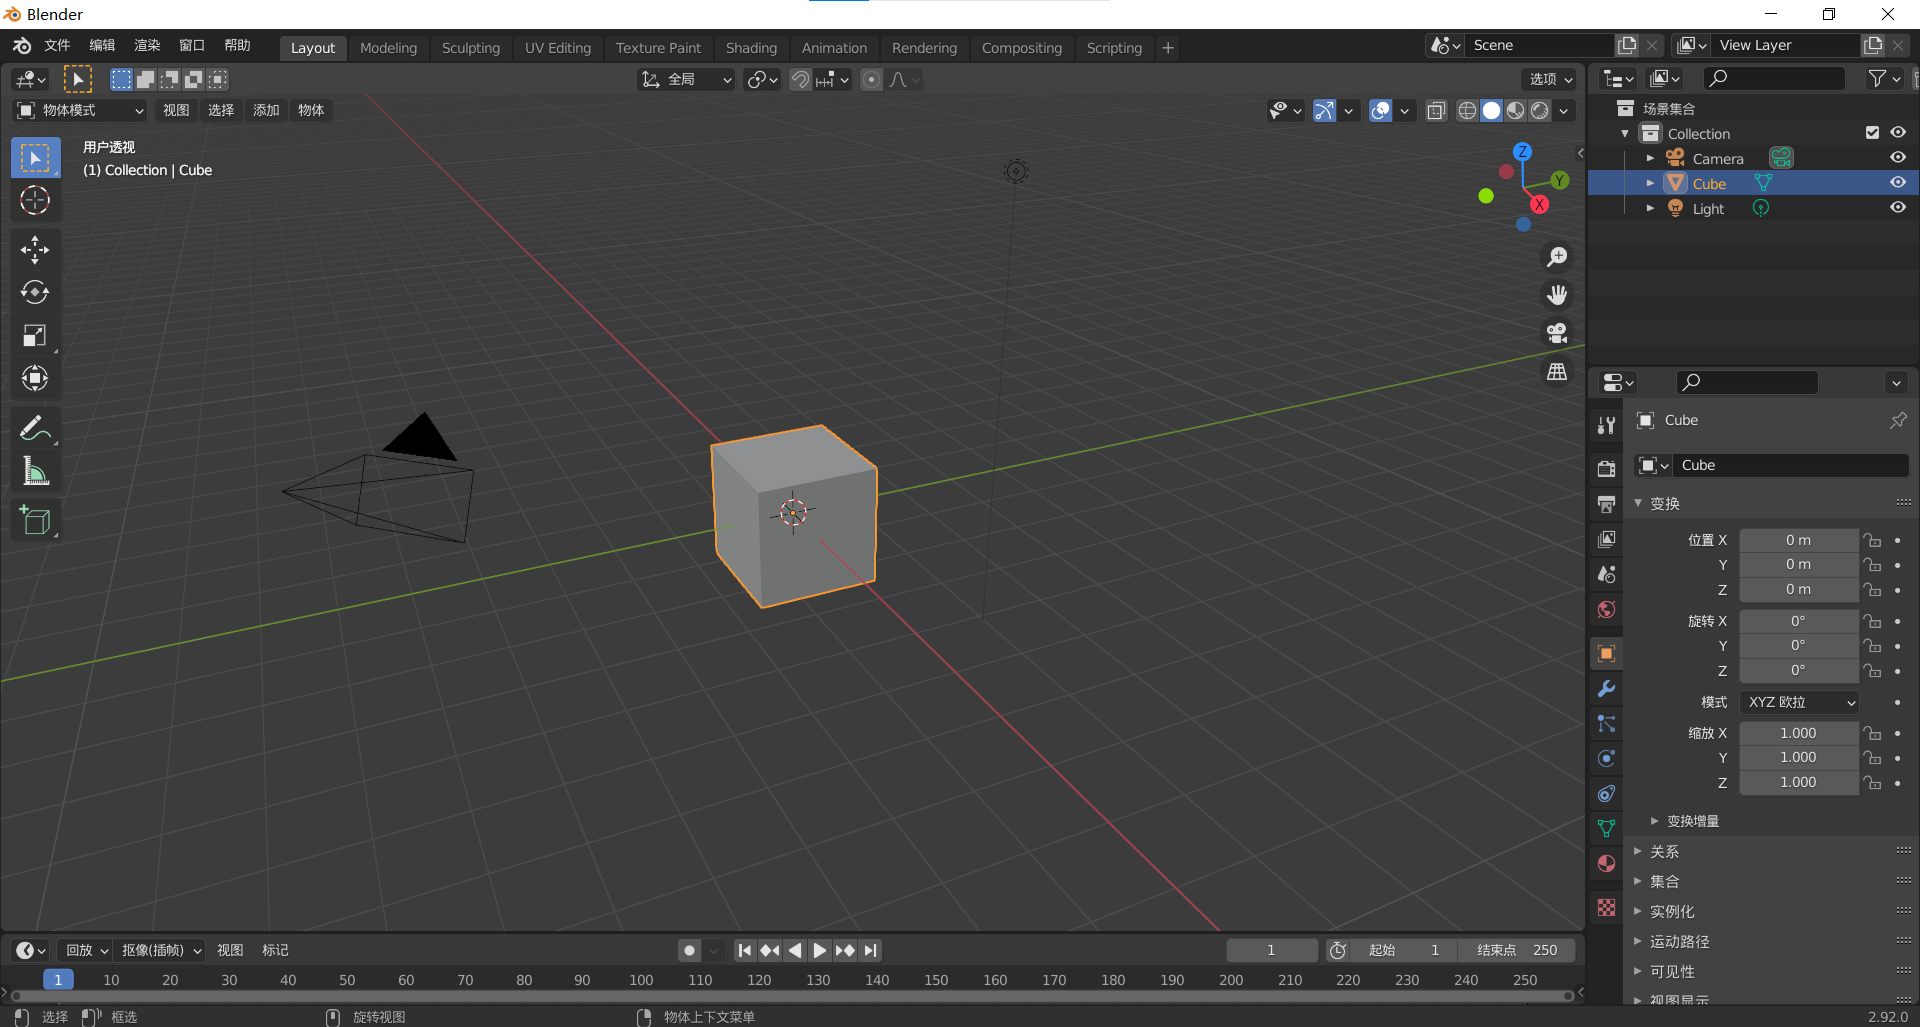
按a,再按del,删除所有元素。
在编辑-偏好设置里可以改成中文。
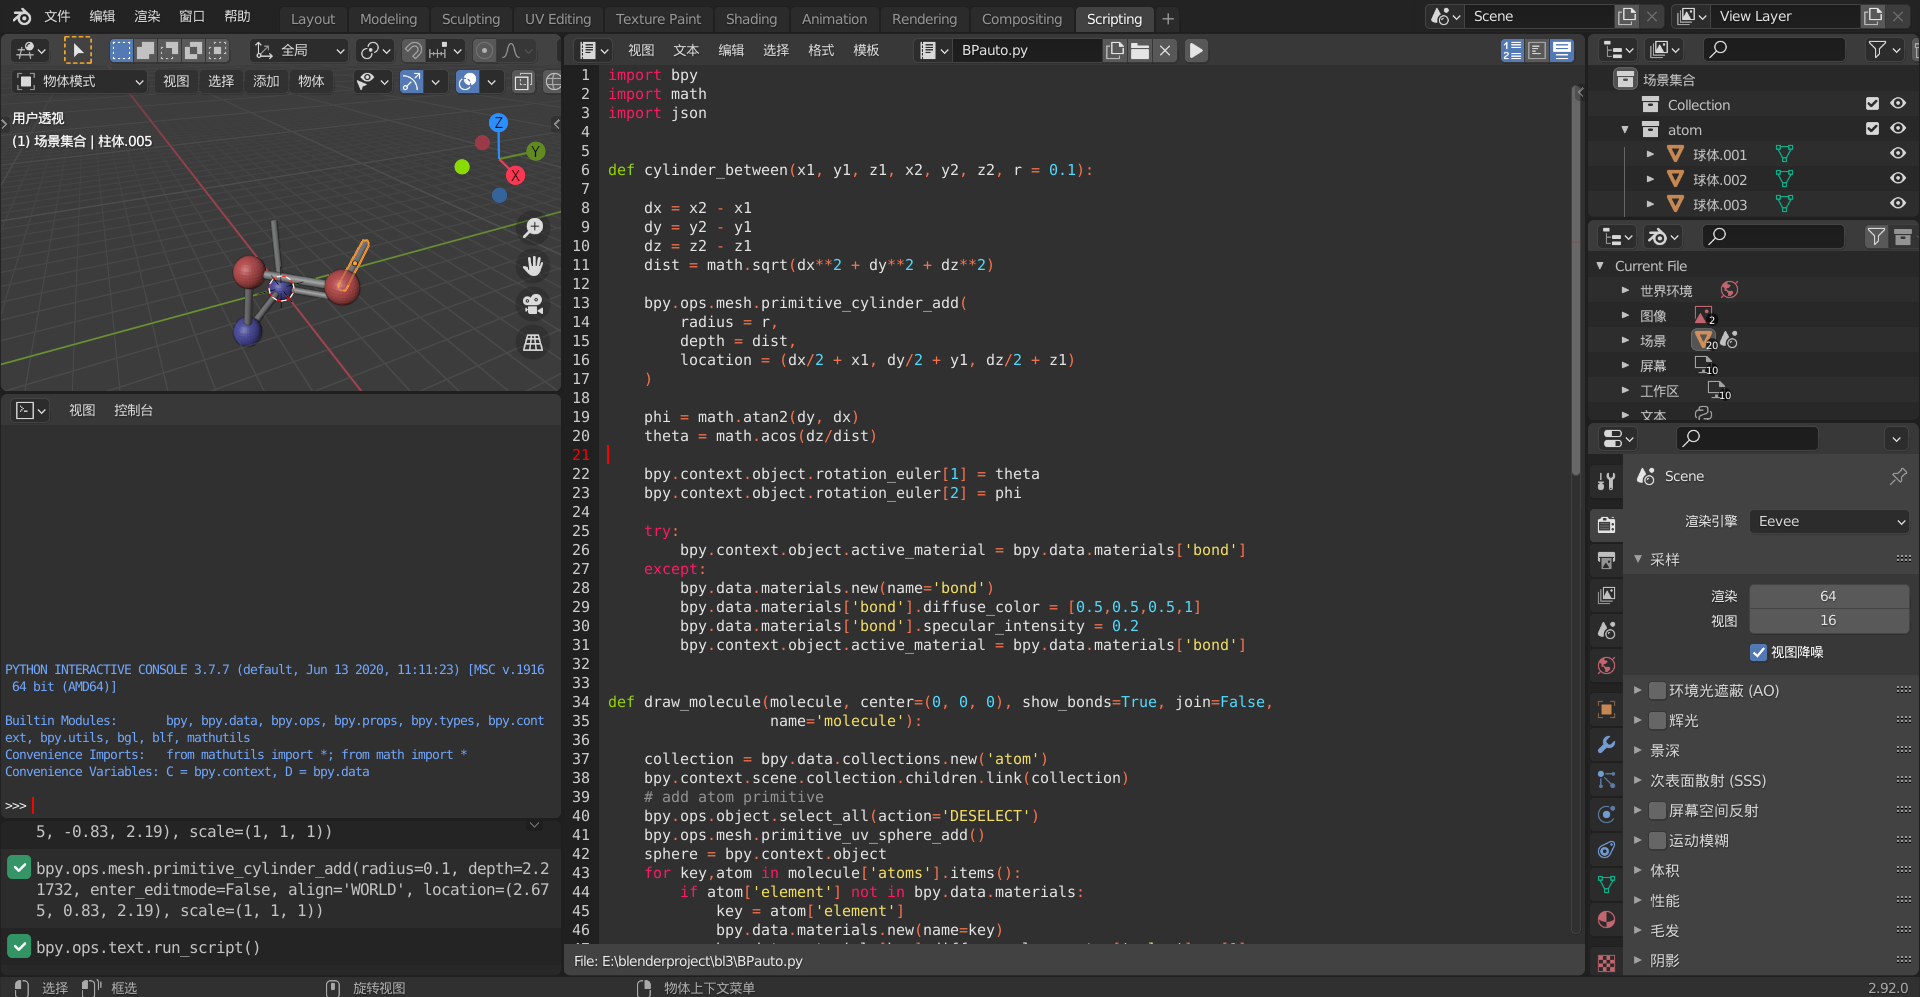
选择上面菜单栏中的Scripting进入脚本编辑工作区
在右边的区域新建文档将下面的代码复制粘贴进去 1
2
3
4
5
6
7
8
9
10
11
12
13
14
15
16
17
18
19
20
21
22
23
24
25
26
27
28
29
30
31
32
33
34
35
36
37
38
39
40
41
42
43
44
45
46
47
48
49
50
51
52
53
54
55
56
57
58
59
60
61
62
63
64
65
66
67
68
69
70
71
72
73
74
75
76
77
78import bpy
import math
import json
def cylinder_between(x1, y1, z1, x2, y2, z2, r = 0.1):
dx = x2 - x1
dy = y2 - y1
dz = z2 - z1
dist = math.sqrt(dx**2 + dy**2 + dz**2)
bpy.ops.mesh.primitive_cylinder_add(
radius = r,
depth = dist,
location = (dx/2 + x1, dy/2 + y1, dz/2 + z1)
)
phi = math.atan2(dy, dx)
theta = math.acos(dz/dist)
bpy.context.object.rotation_euler[1] = theta
bpy.context.object.rotation_euler[2] = phi
try:
bpy.context.object.active_material = bpy.data.materials['bond']
except:
bpy.data.materials.new(name='bond')
bpy.data.materials['bond'].diffuse_color = [0.5,0.5,0.5,1]
bpy.data.materials['bond'].specular_intensity = 0.2
bpy.context.object.active_material = bpy.data.materials['bond']
def draw_molecule(molecule, center=(0, 0, 0), show_bonds=True, join=False,
name='molecule'):
collection = bpy.data.collections.new('atom')
bpy.context.scene.collection.children.link(collection)
# add atom primitive
bpy.ops.object.select_all(action='DESELECT')
bpy.ops.mesh.primitive_uv_sphere_add()
sphere = bpy.context.object
for key,atom in molecule['atoms'].items():
if atom['element'] not in bpy.data.materials:
key = atom['element']
bpy.data.materials.new(name=key)
bpy.data.materials[key].diffuse_color = atom['color'] + [1]
bpy.data.materials[key].specular_intensity = 0.2
loc = atom['location']
atom_sphere = sphere.copy()
atom_sphere.data = sphere.data.copy()
atom_sphere.location = [loc[0],loc[1],loc[2]]
atom_sphere.dimensions = [atom['radius']*2]*3
atom_sphere.active_material = bpy.data.materials[atom['element']]
collection.objects.link(atom_sphere)
bpy.ops.object.select_all(action='DESELECT')
sphere.select_set(True)
bpy.ops.object.delete()
for key,bond in molecule['bonds'].items():
s = bond[0]
e = bond[1]
cylinder_between(s[0],s[1],s[2],e[0],e[1],e[2])
if join:
bpy.ops.object.select_all(action='SELECT')
bpy.ops.object.join()
if __name__ == '__main__':
r = 0.3 # radius
with open(r'E:\blenderproject\bl3\BP.json') as in_file:
molecule = json.load(in_file)
draw_molecule(molecule)
将BP.json的文件路径改为先前创建好的文件的路径。 一些其他需要修改的地方(bond的半径,颜色等)也可以自行修改。
点击运行或按alt+P执行程序。可以得到下图:
3.2.2 扩展整列
切换到layout,选择处于原点的原子。
按a全选,再按ctrl+j结合所有元素组合
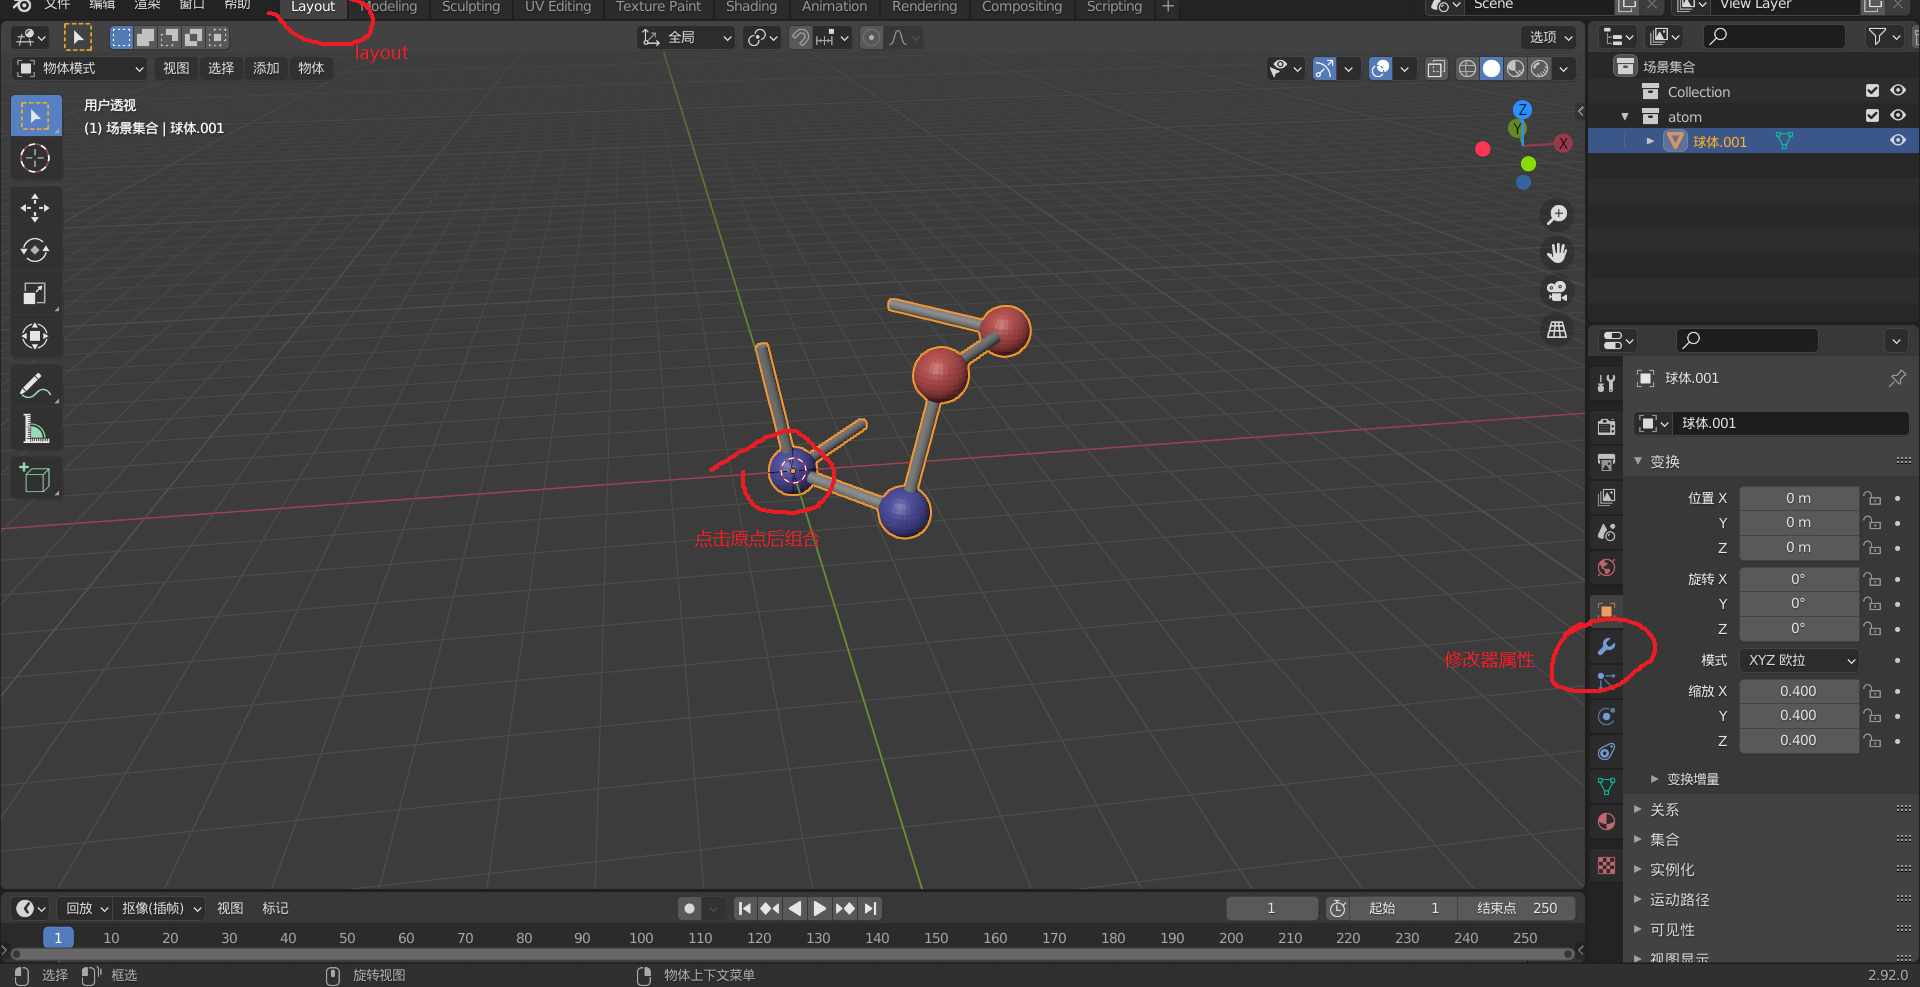
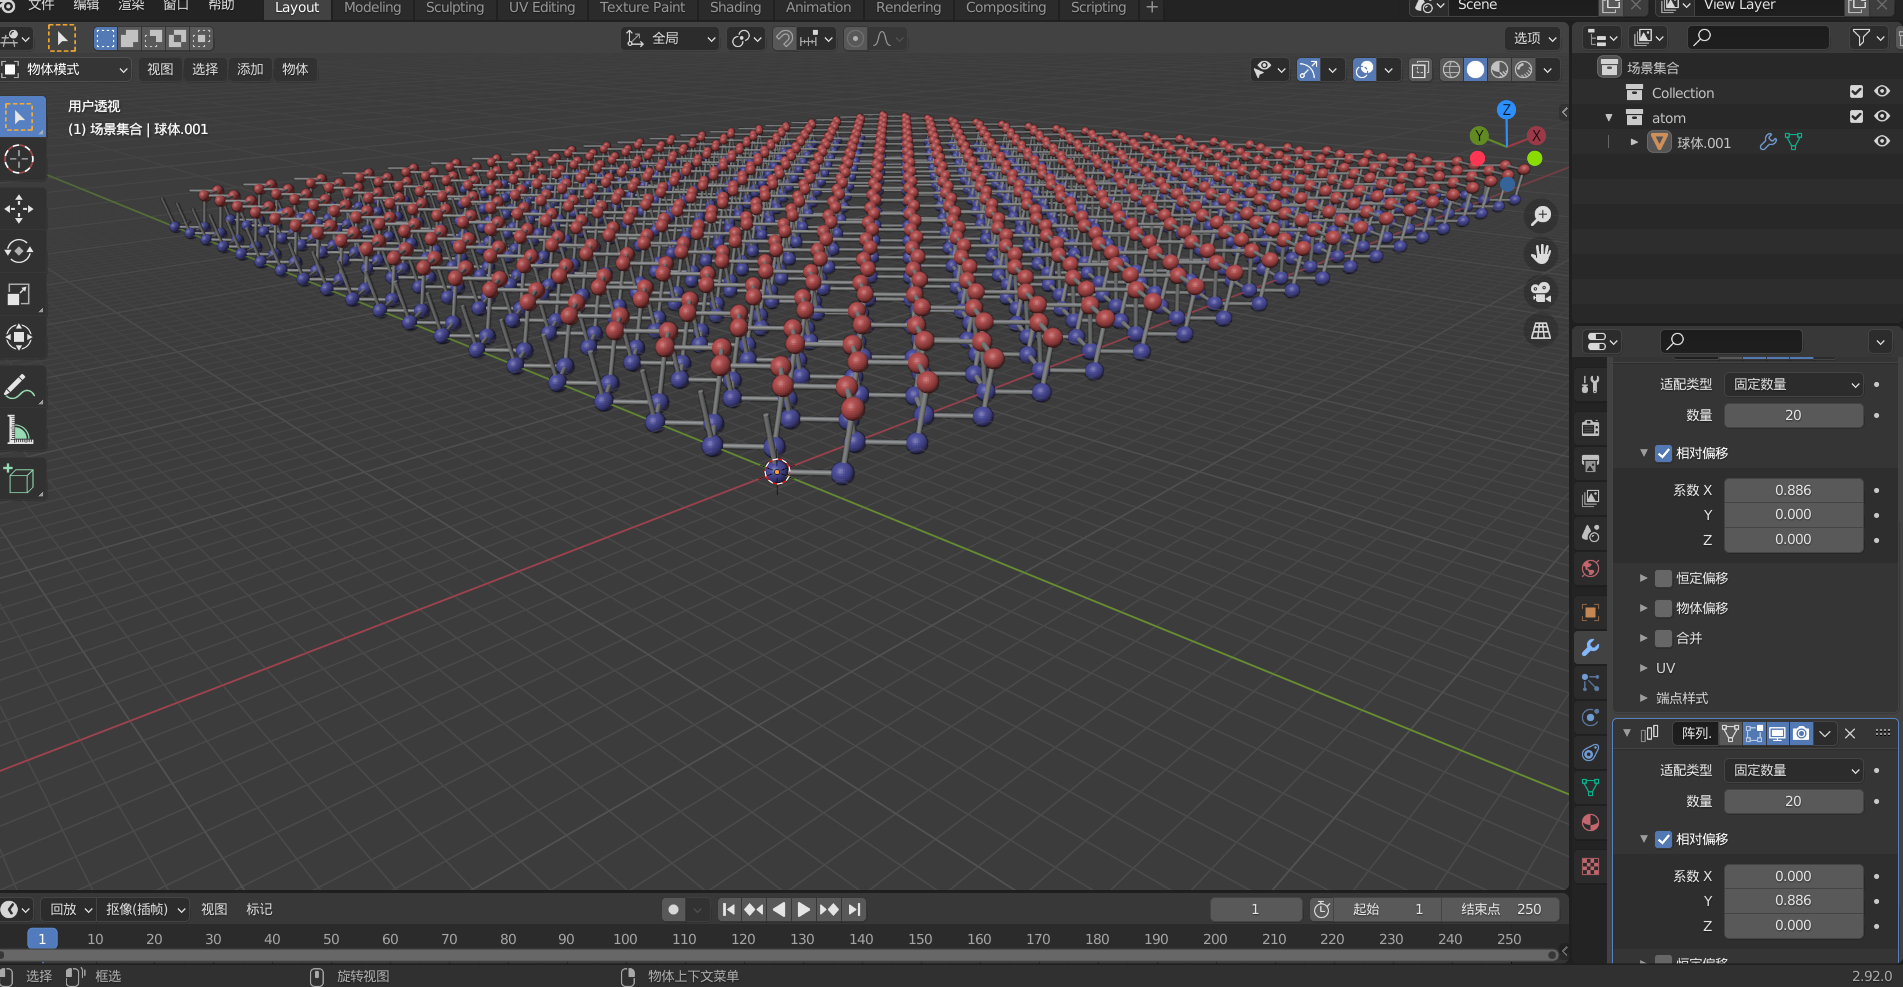
点击修改器属性,添加阵列修改器,数量选择20,相对位移x改为0.886,其他为0。再添加一个,这个相对偏移上y改为0.886。
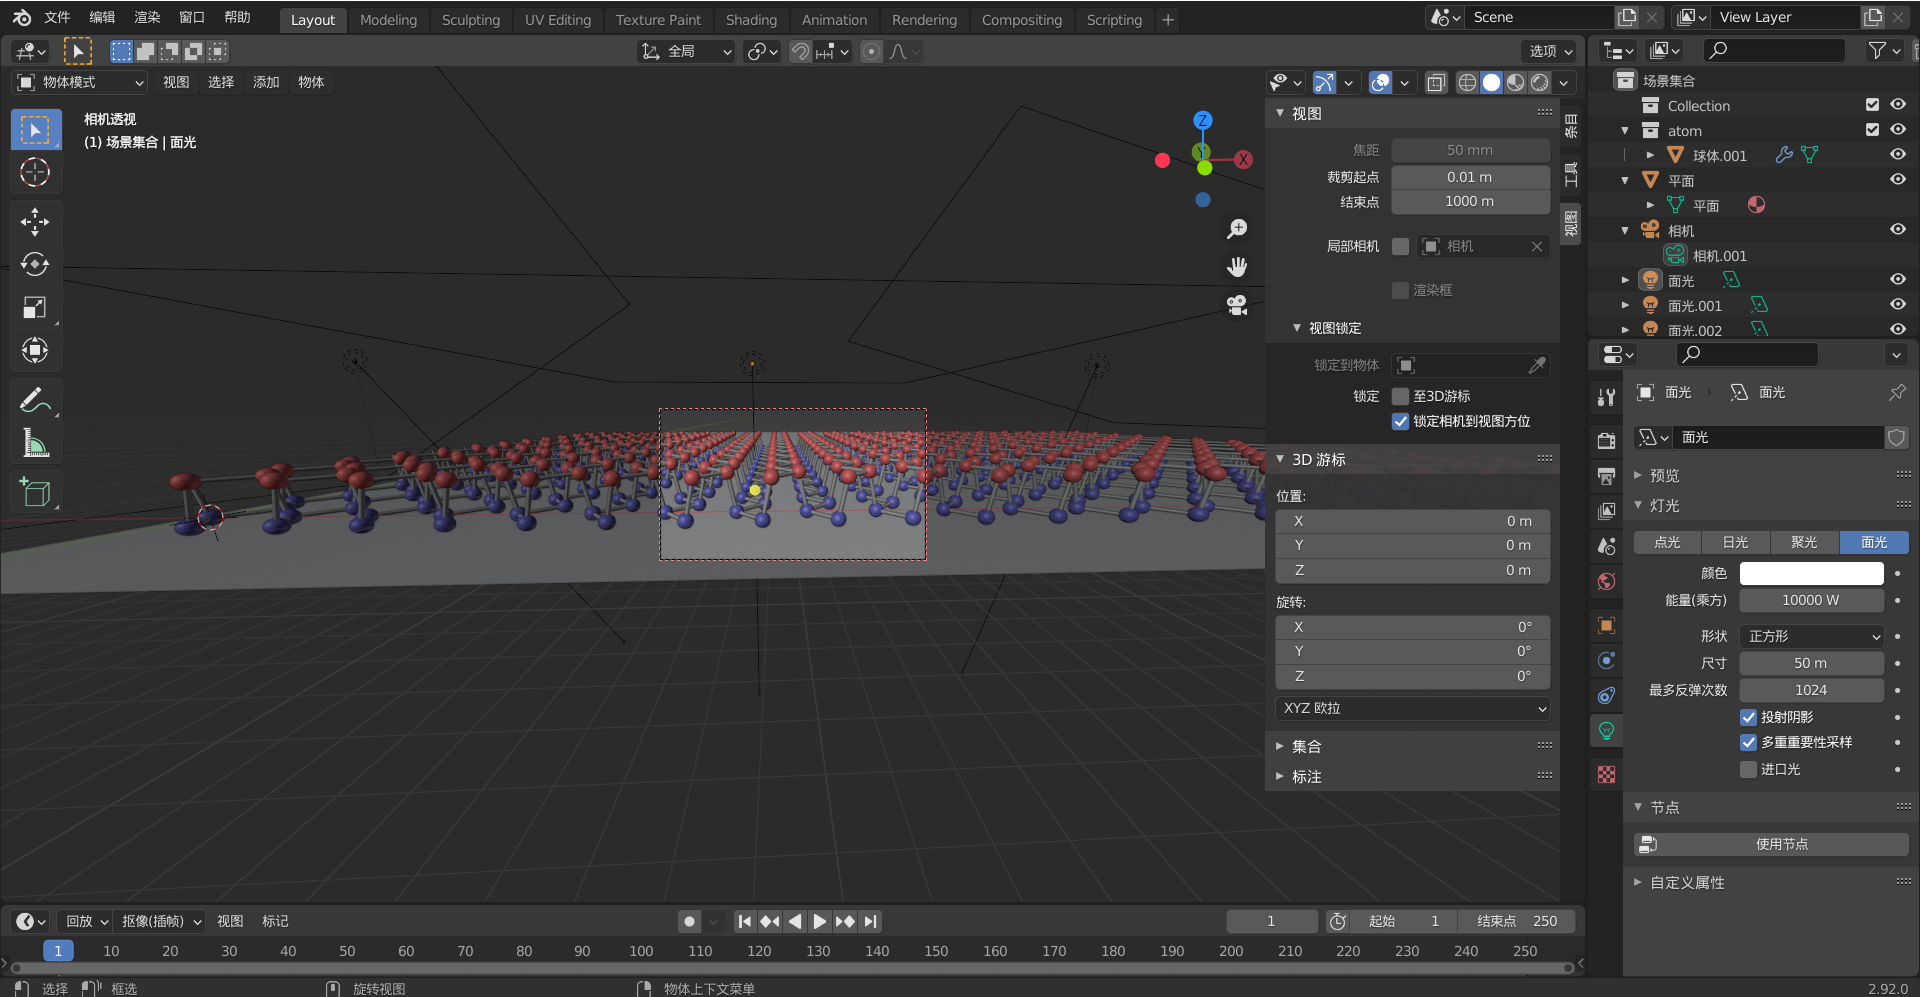
最后shift+a添加面光、平面、相机。选取合适的角度进行渲染拍摄吧。参考资料[3]
参考资料
[1] github 代码 blender-chemicals
[3]【Blender科研绘图】案例2-石墨烯